
INTRODUCING ENSEMBLE DISPLAY
Your rehearsal starts before the first note.
Give every ensemble clear instructions, reminders, and rehearsal slides as students walk in. Prepare ahead, set your schedule, and let Ensemble Display follow your teaching day.
Read the getting-started guide ↓
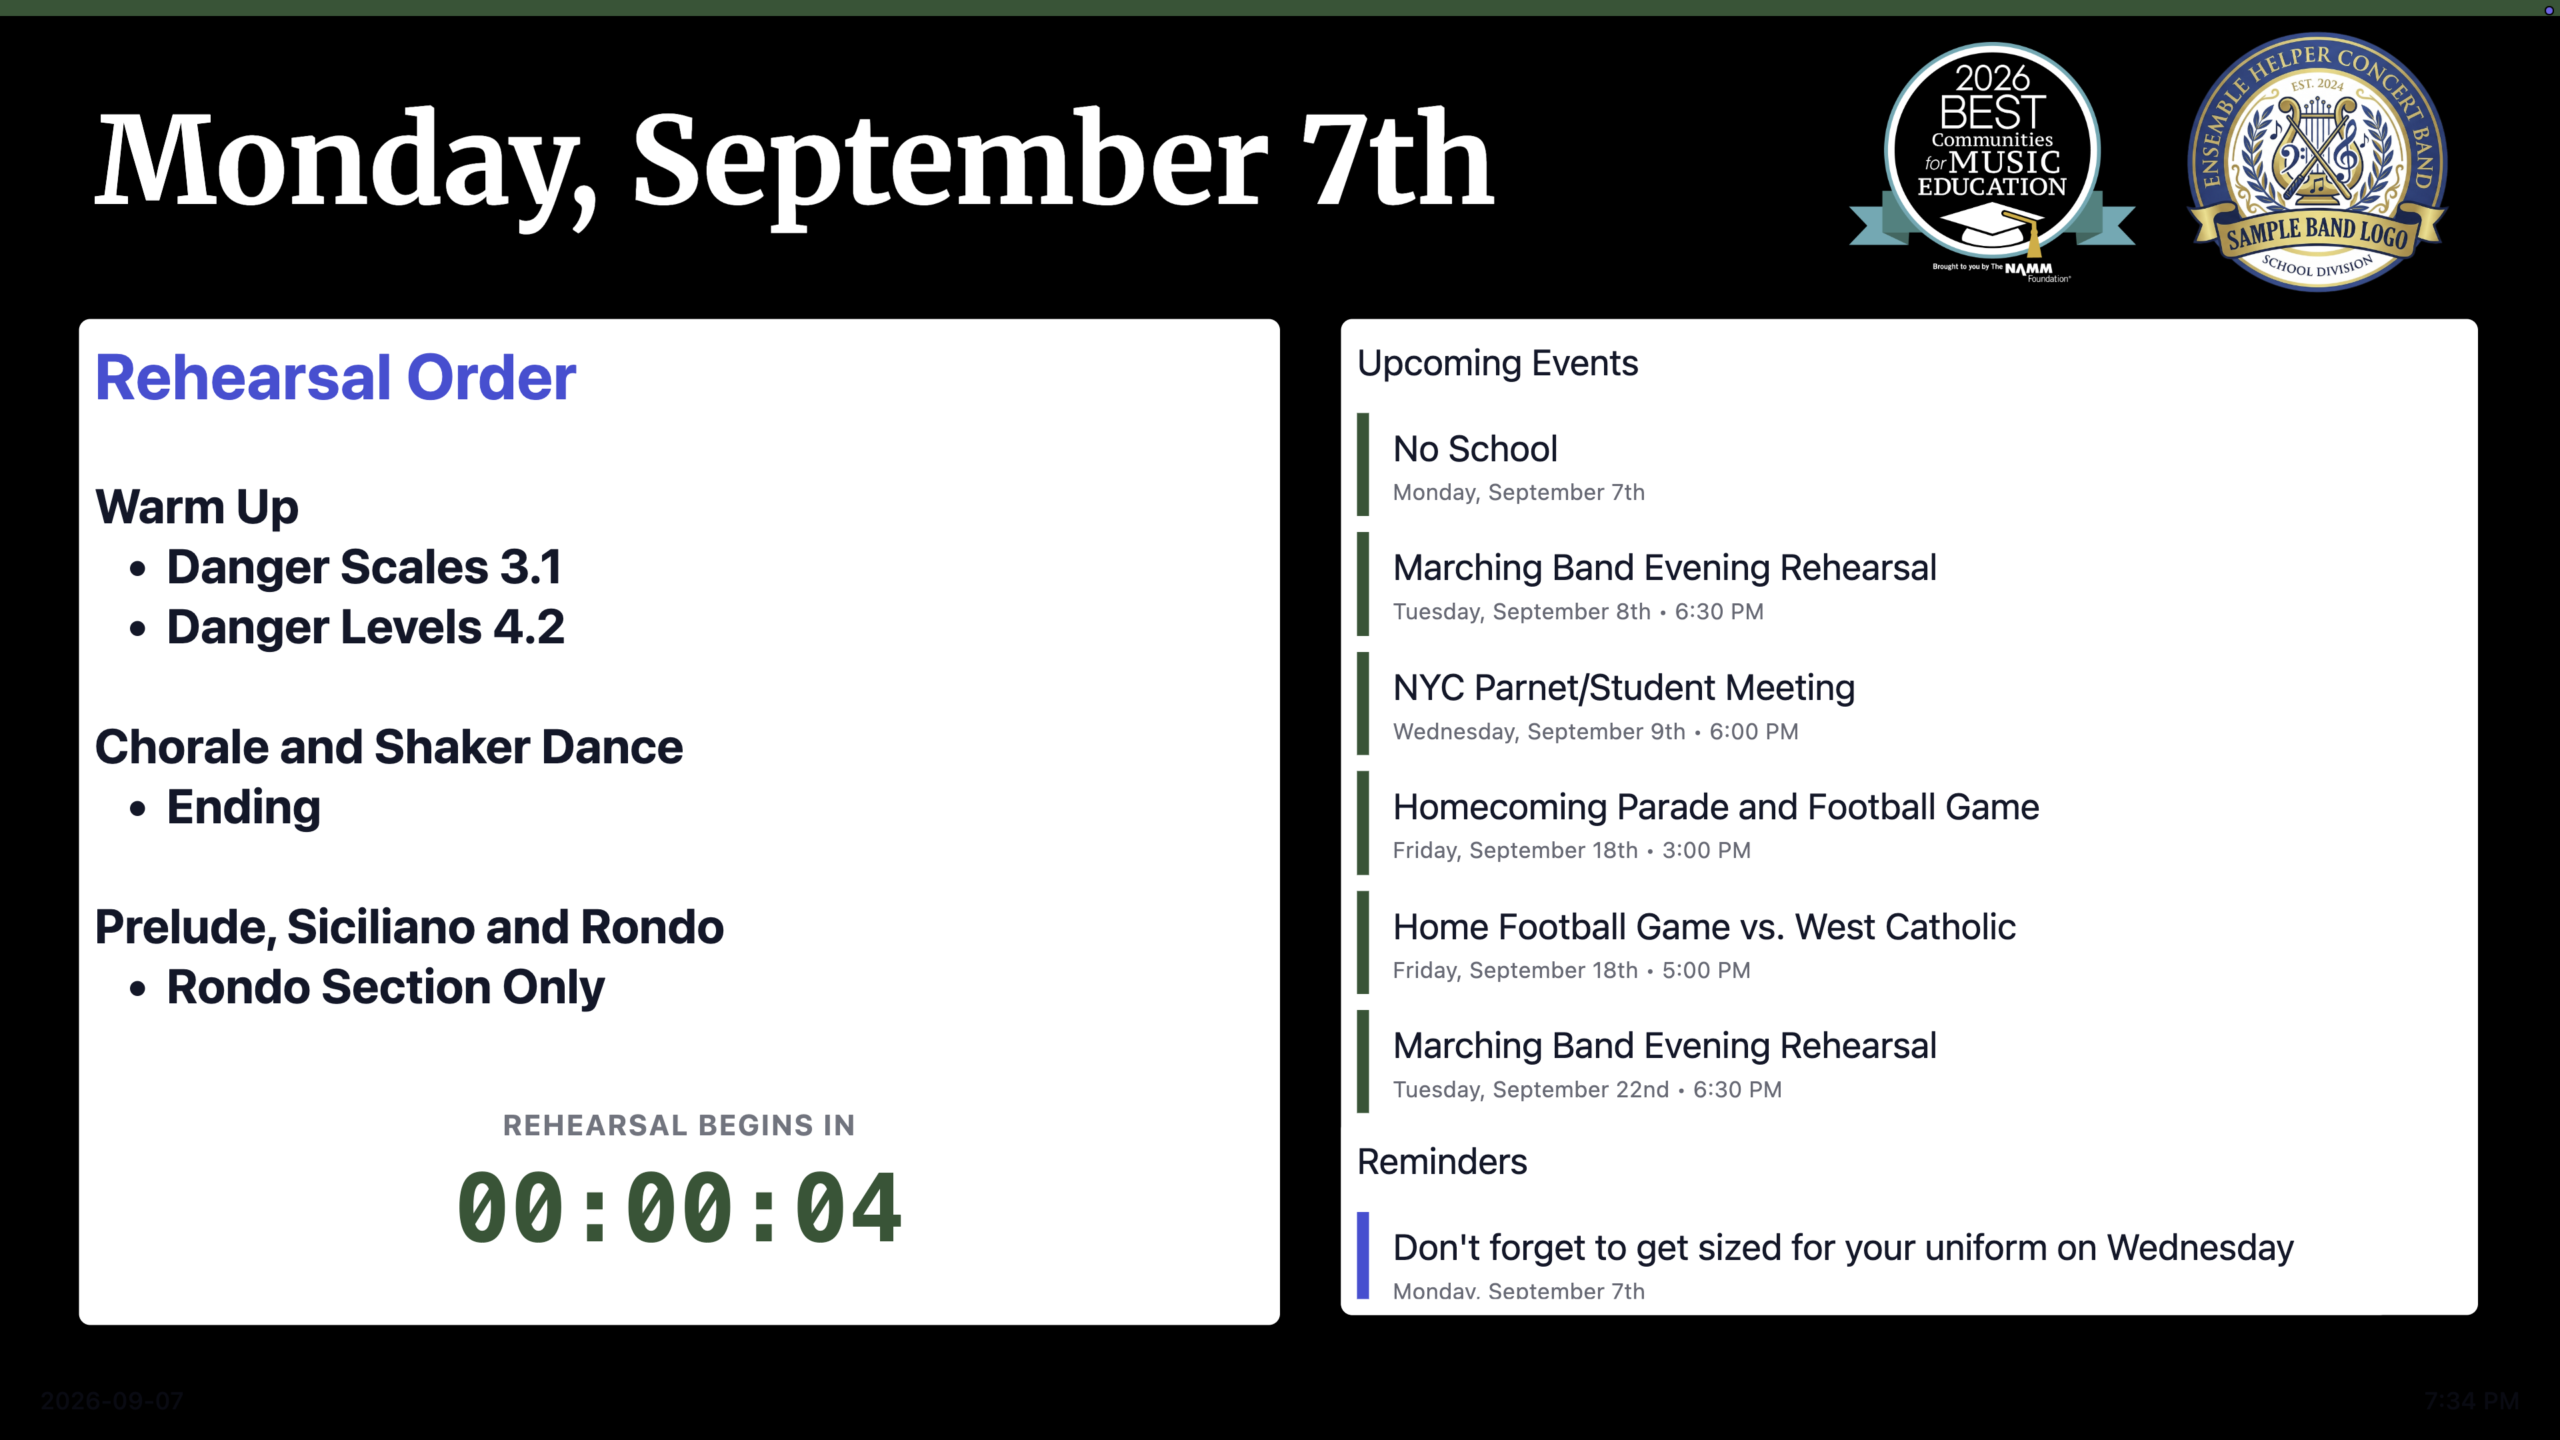
Create once. Make it yours.
Build a display with multiple slides for each ensemble. Combine formatted text, images, your ensemble logo, dates, and reminders to make the information students need easy to see.
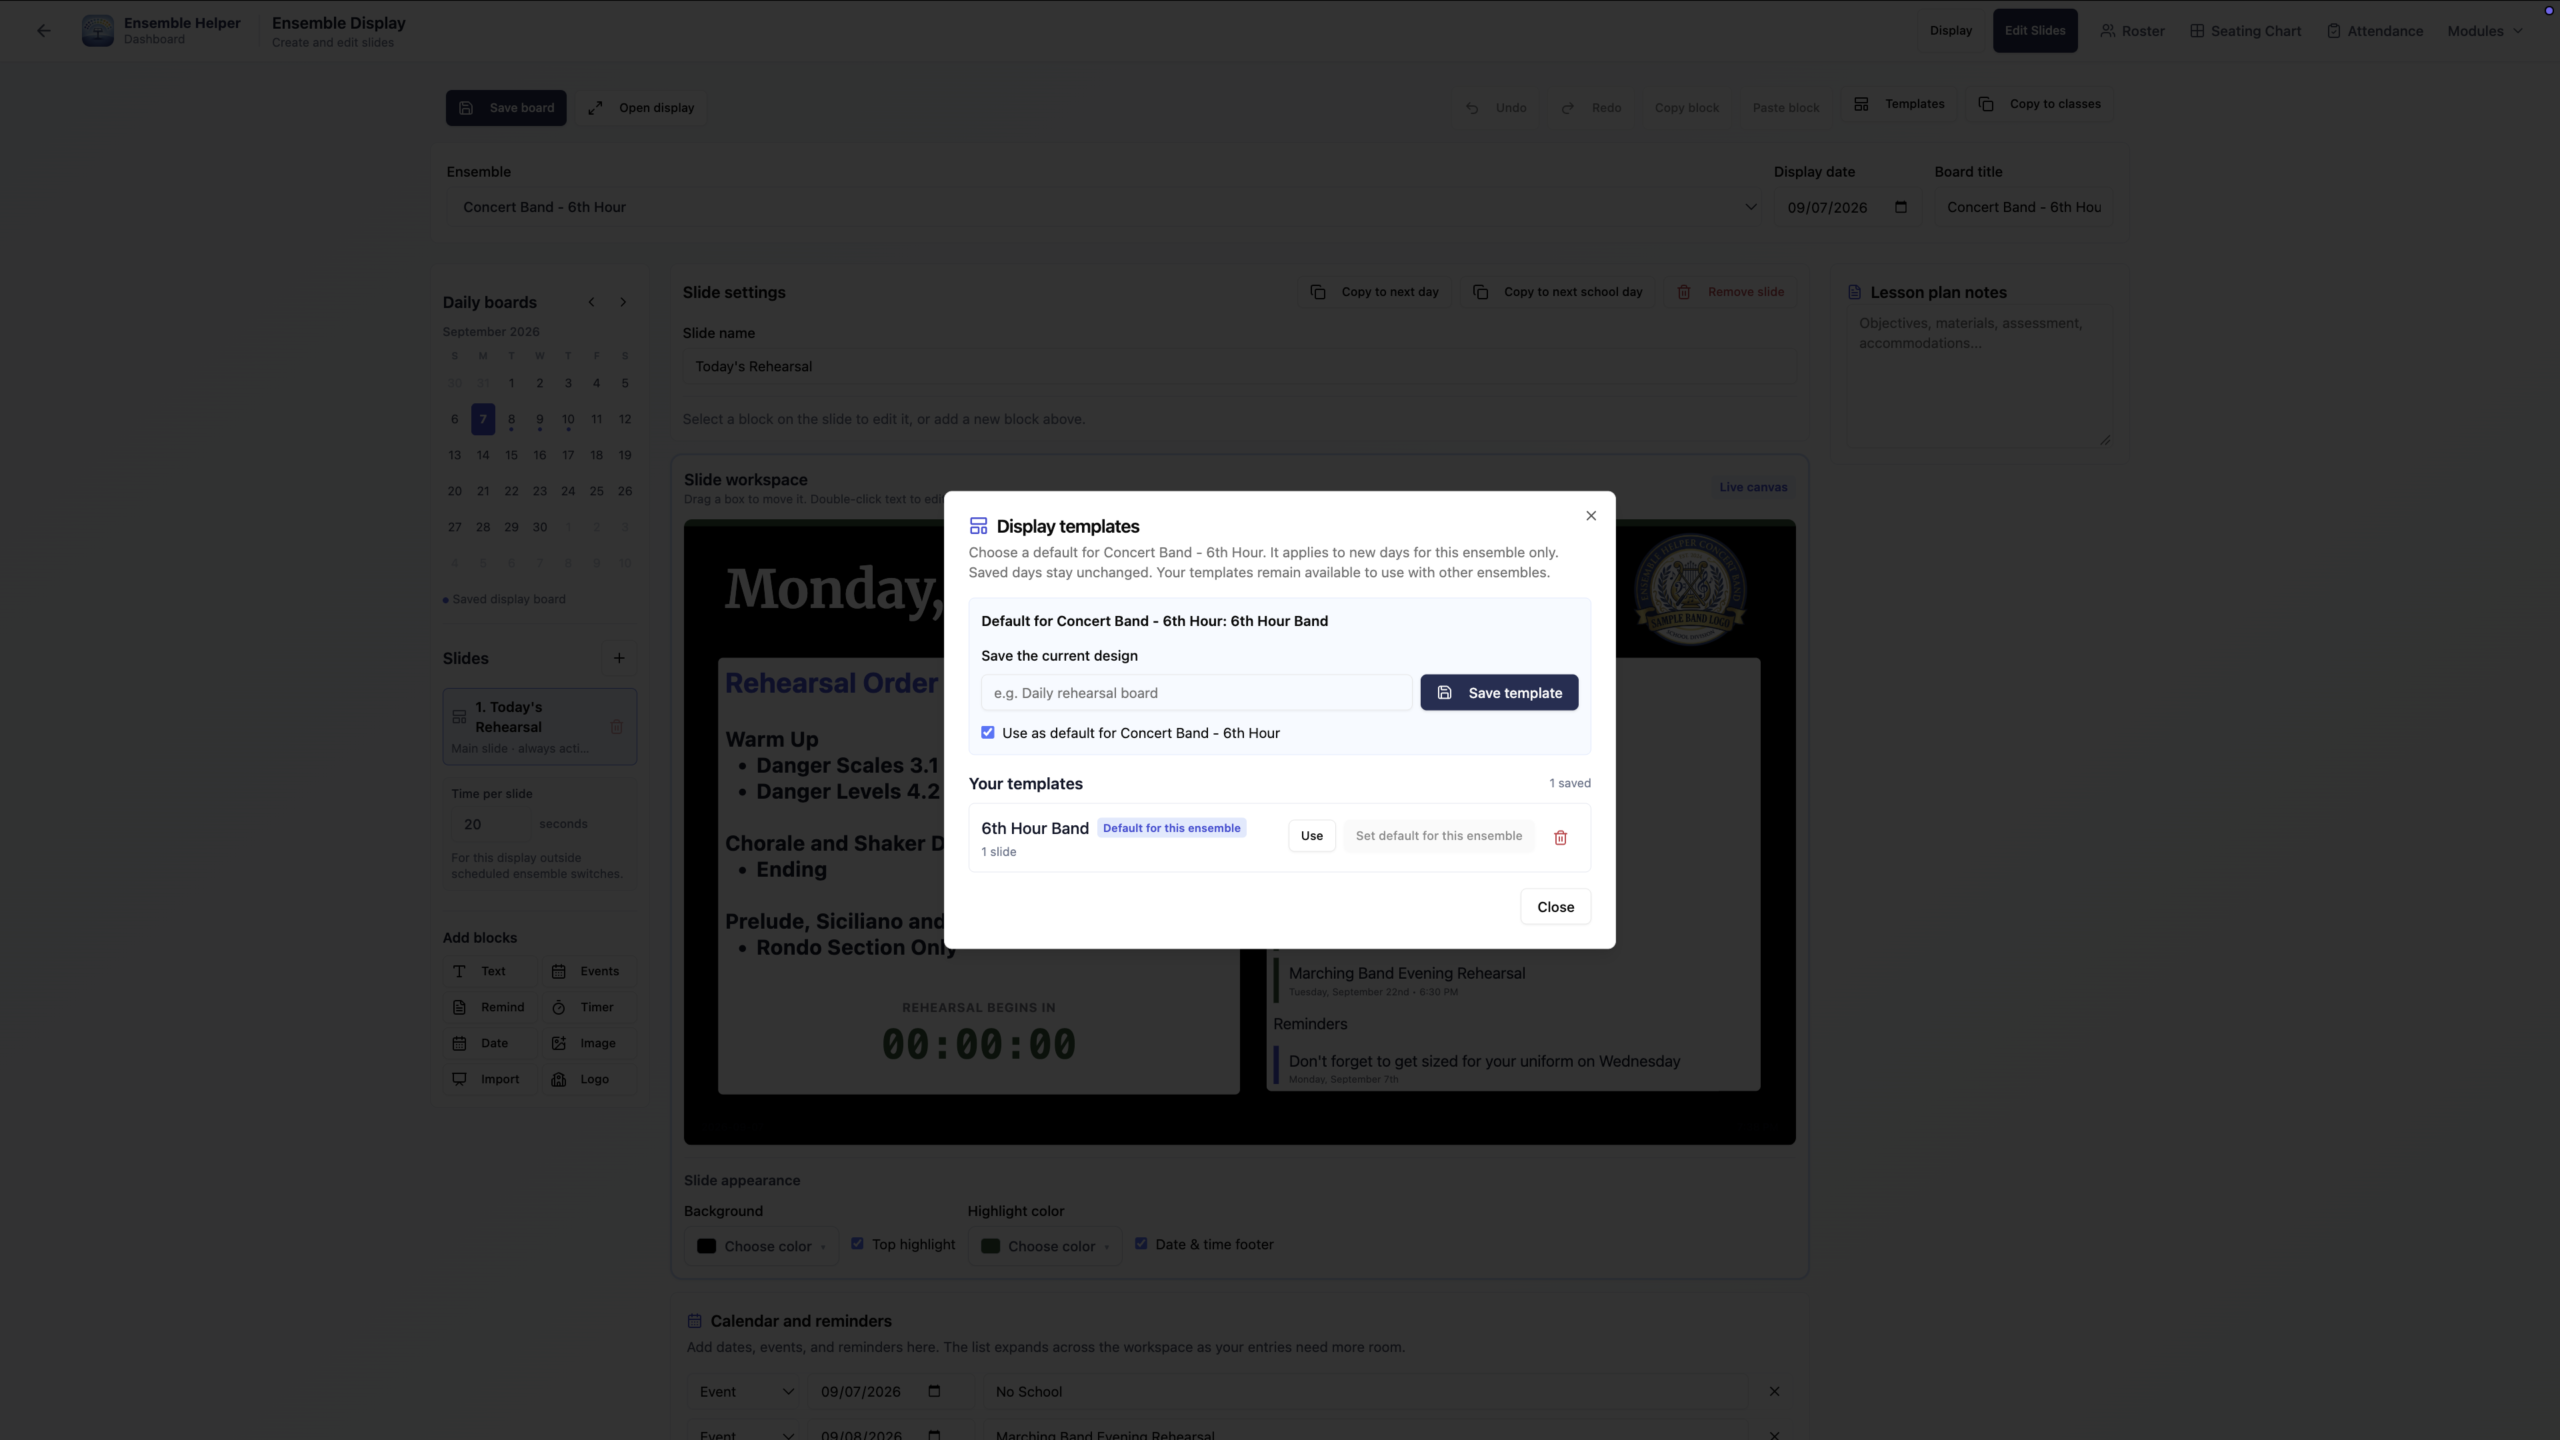
Save a default template for each ensemble, so your daily preparation starts with a familiar layout. Reuse slides and copy blocks or styling as you build the next day’s display.
The right ensemble. At the right time.
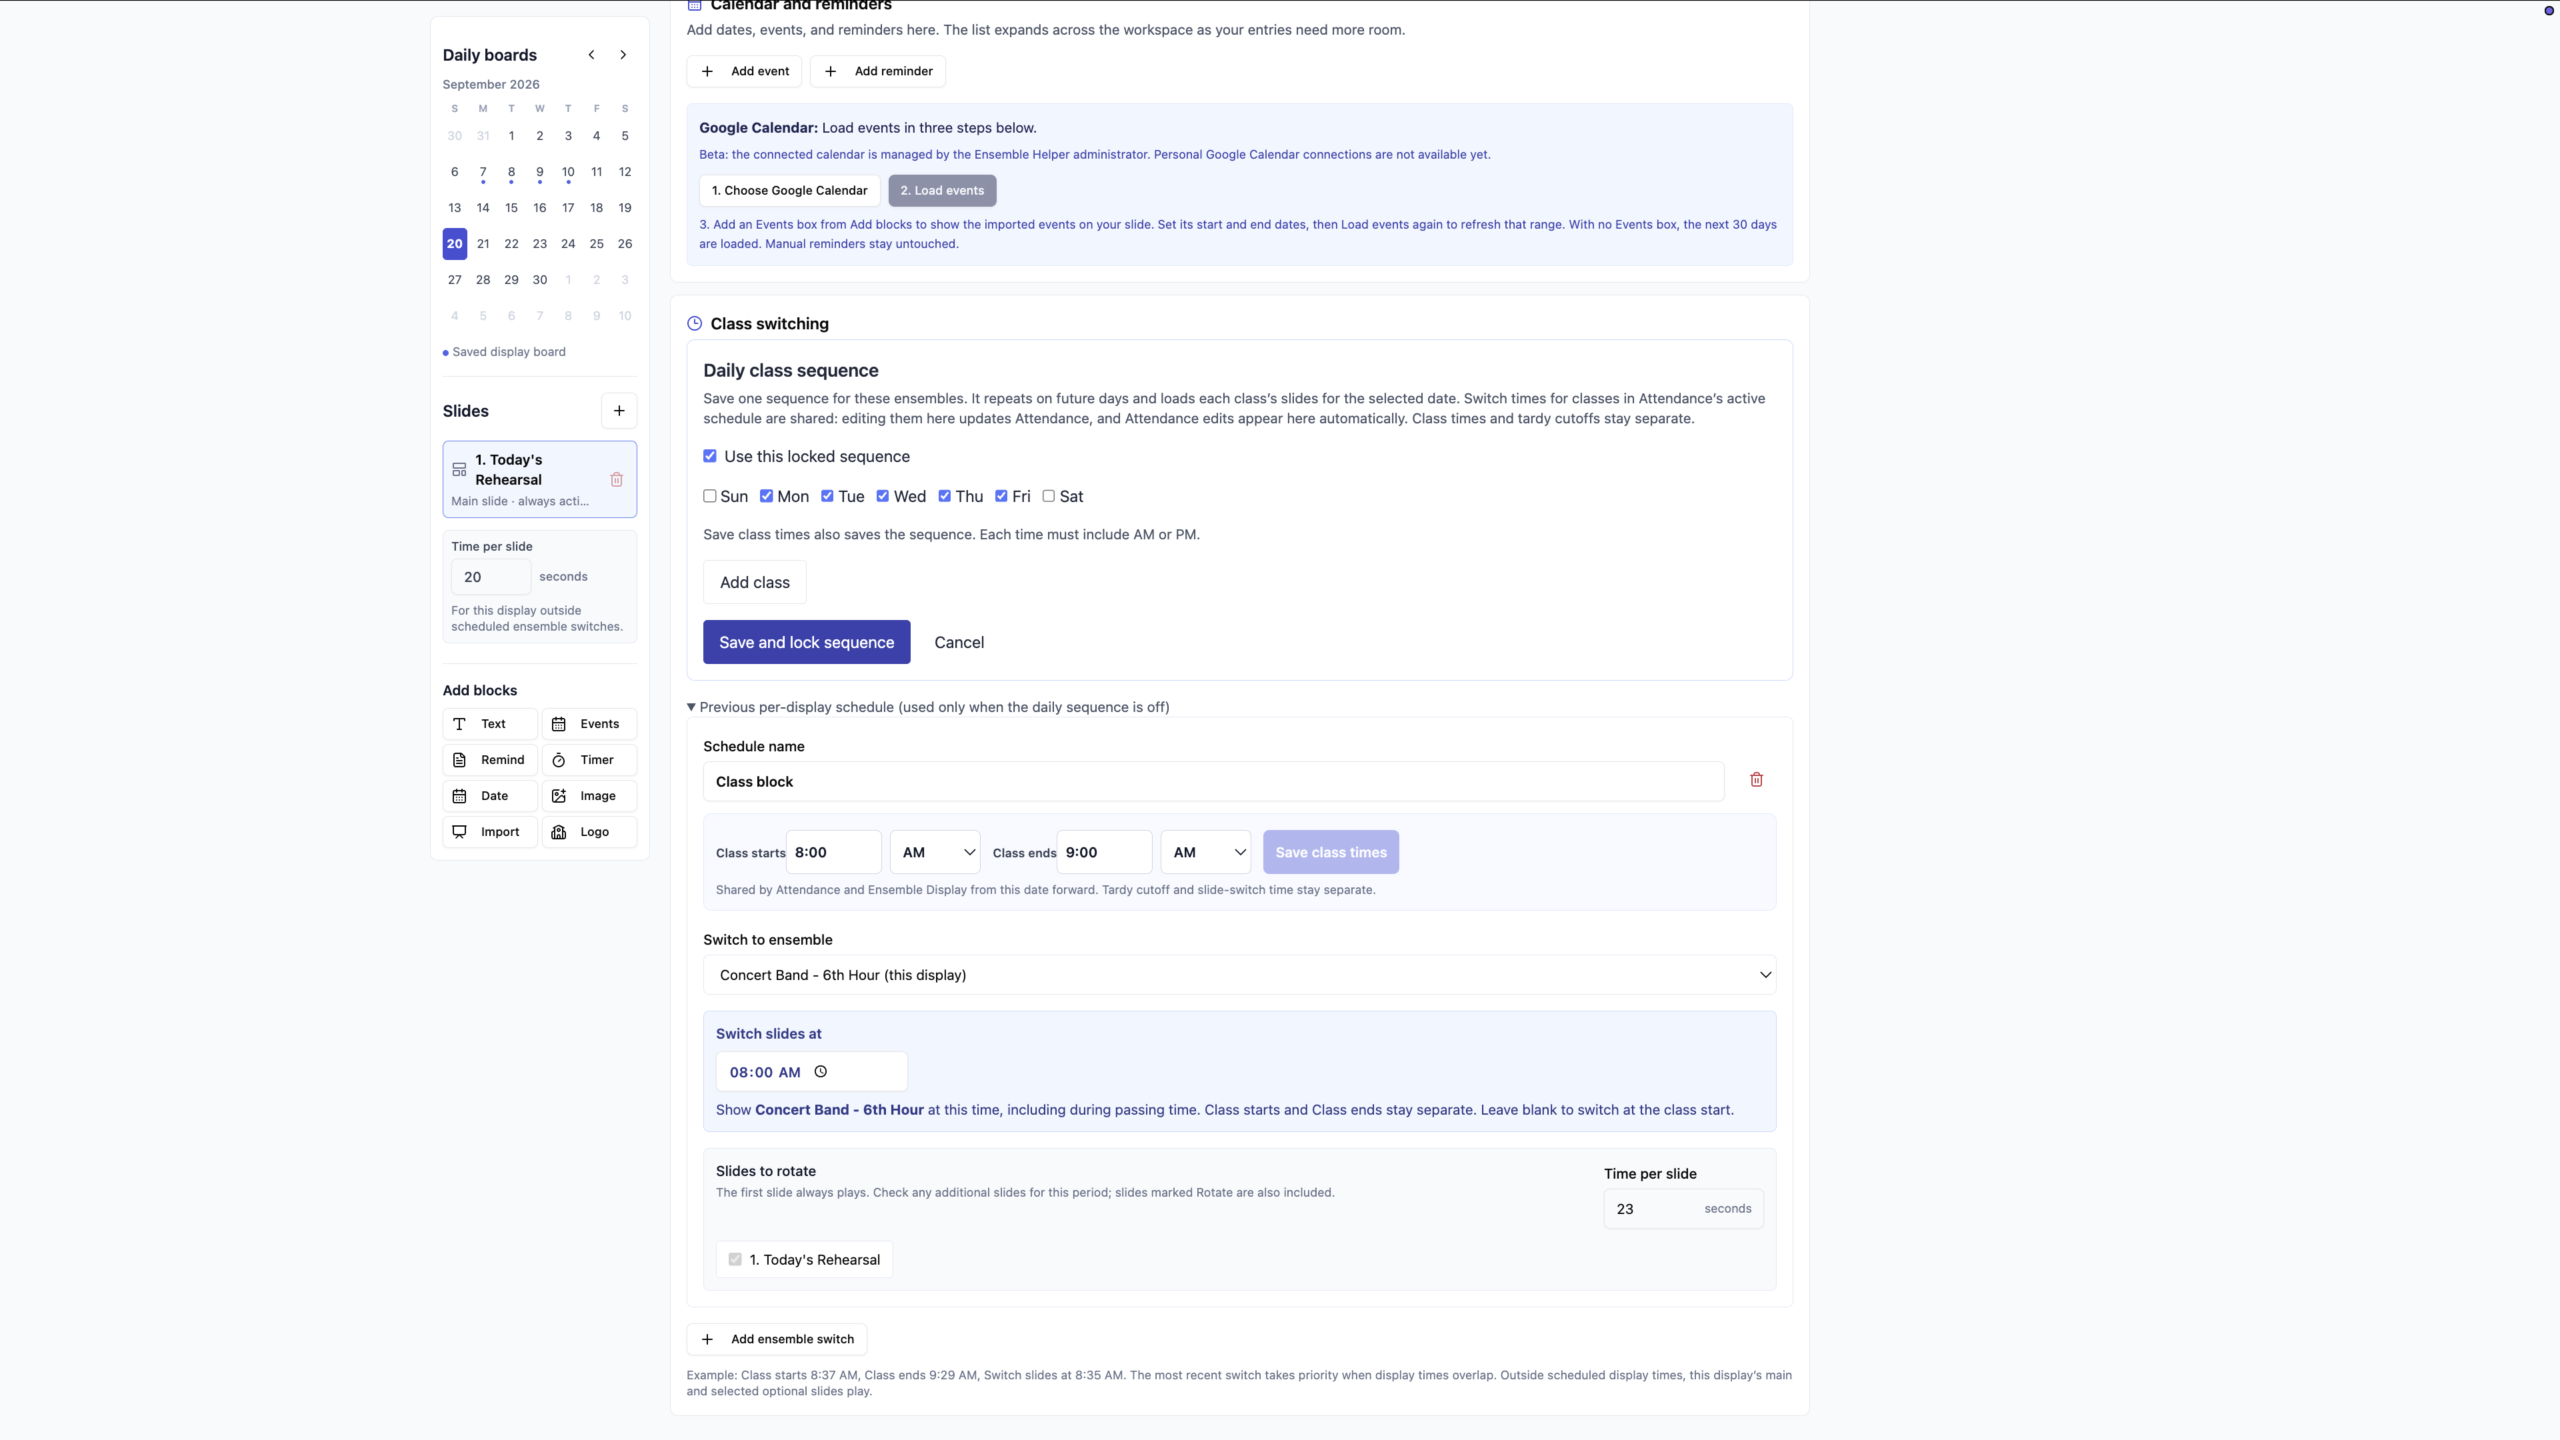
Choose the exact time your display switches to the next ensemble—even during passing time. Keep those switch times separate from class start and end times, which stay connected with Attendance.
Set slide rotation timing independently, so each ensemble’s slides move at the pace you choose. Prepare the next class’s display while keeping your attention on the students in front of you.
Less rebuilding between rehearsals.
Copy a slide to another class or the next school day. Each copy can be adjusted for that ensemble, so shared material does not have to mean identical instructions.
Use Shared With Me to play displays shared with you. When you have editor access, you can help prepare and update the display too.
A few practical details
Can each ensemble have its own template?
Yes. Set an ensemble’s default template to keep its display consistent while updating the day’s content.
Can the display change before class starts?
Yes. Ensemble switch times are separate from class start and end times, so you can have the next display ready during passing time.
Do I have to rebuild my slides every day?
No. Reuse templates, copy slides across classes, or send a slide to the next school day. The next-school-day shortcut skips weekends.
Prepare the screen. Focus on the music.
Bring your rehearsal information into the same daily workflow as your ensembles and attendance.
Open Ensemble HelperGet started with Ensemble Display
Start with one ensemble and one day. Once the display looks right, reuse the layout for the rest of your teaching schedule.
1. Choose your ensemble and day
Open Ensemble Display in Ensemble Helper and choose the ensemble and date you want to prepare. Begin with the instructions students should see when they enter the room.
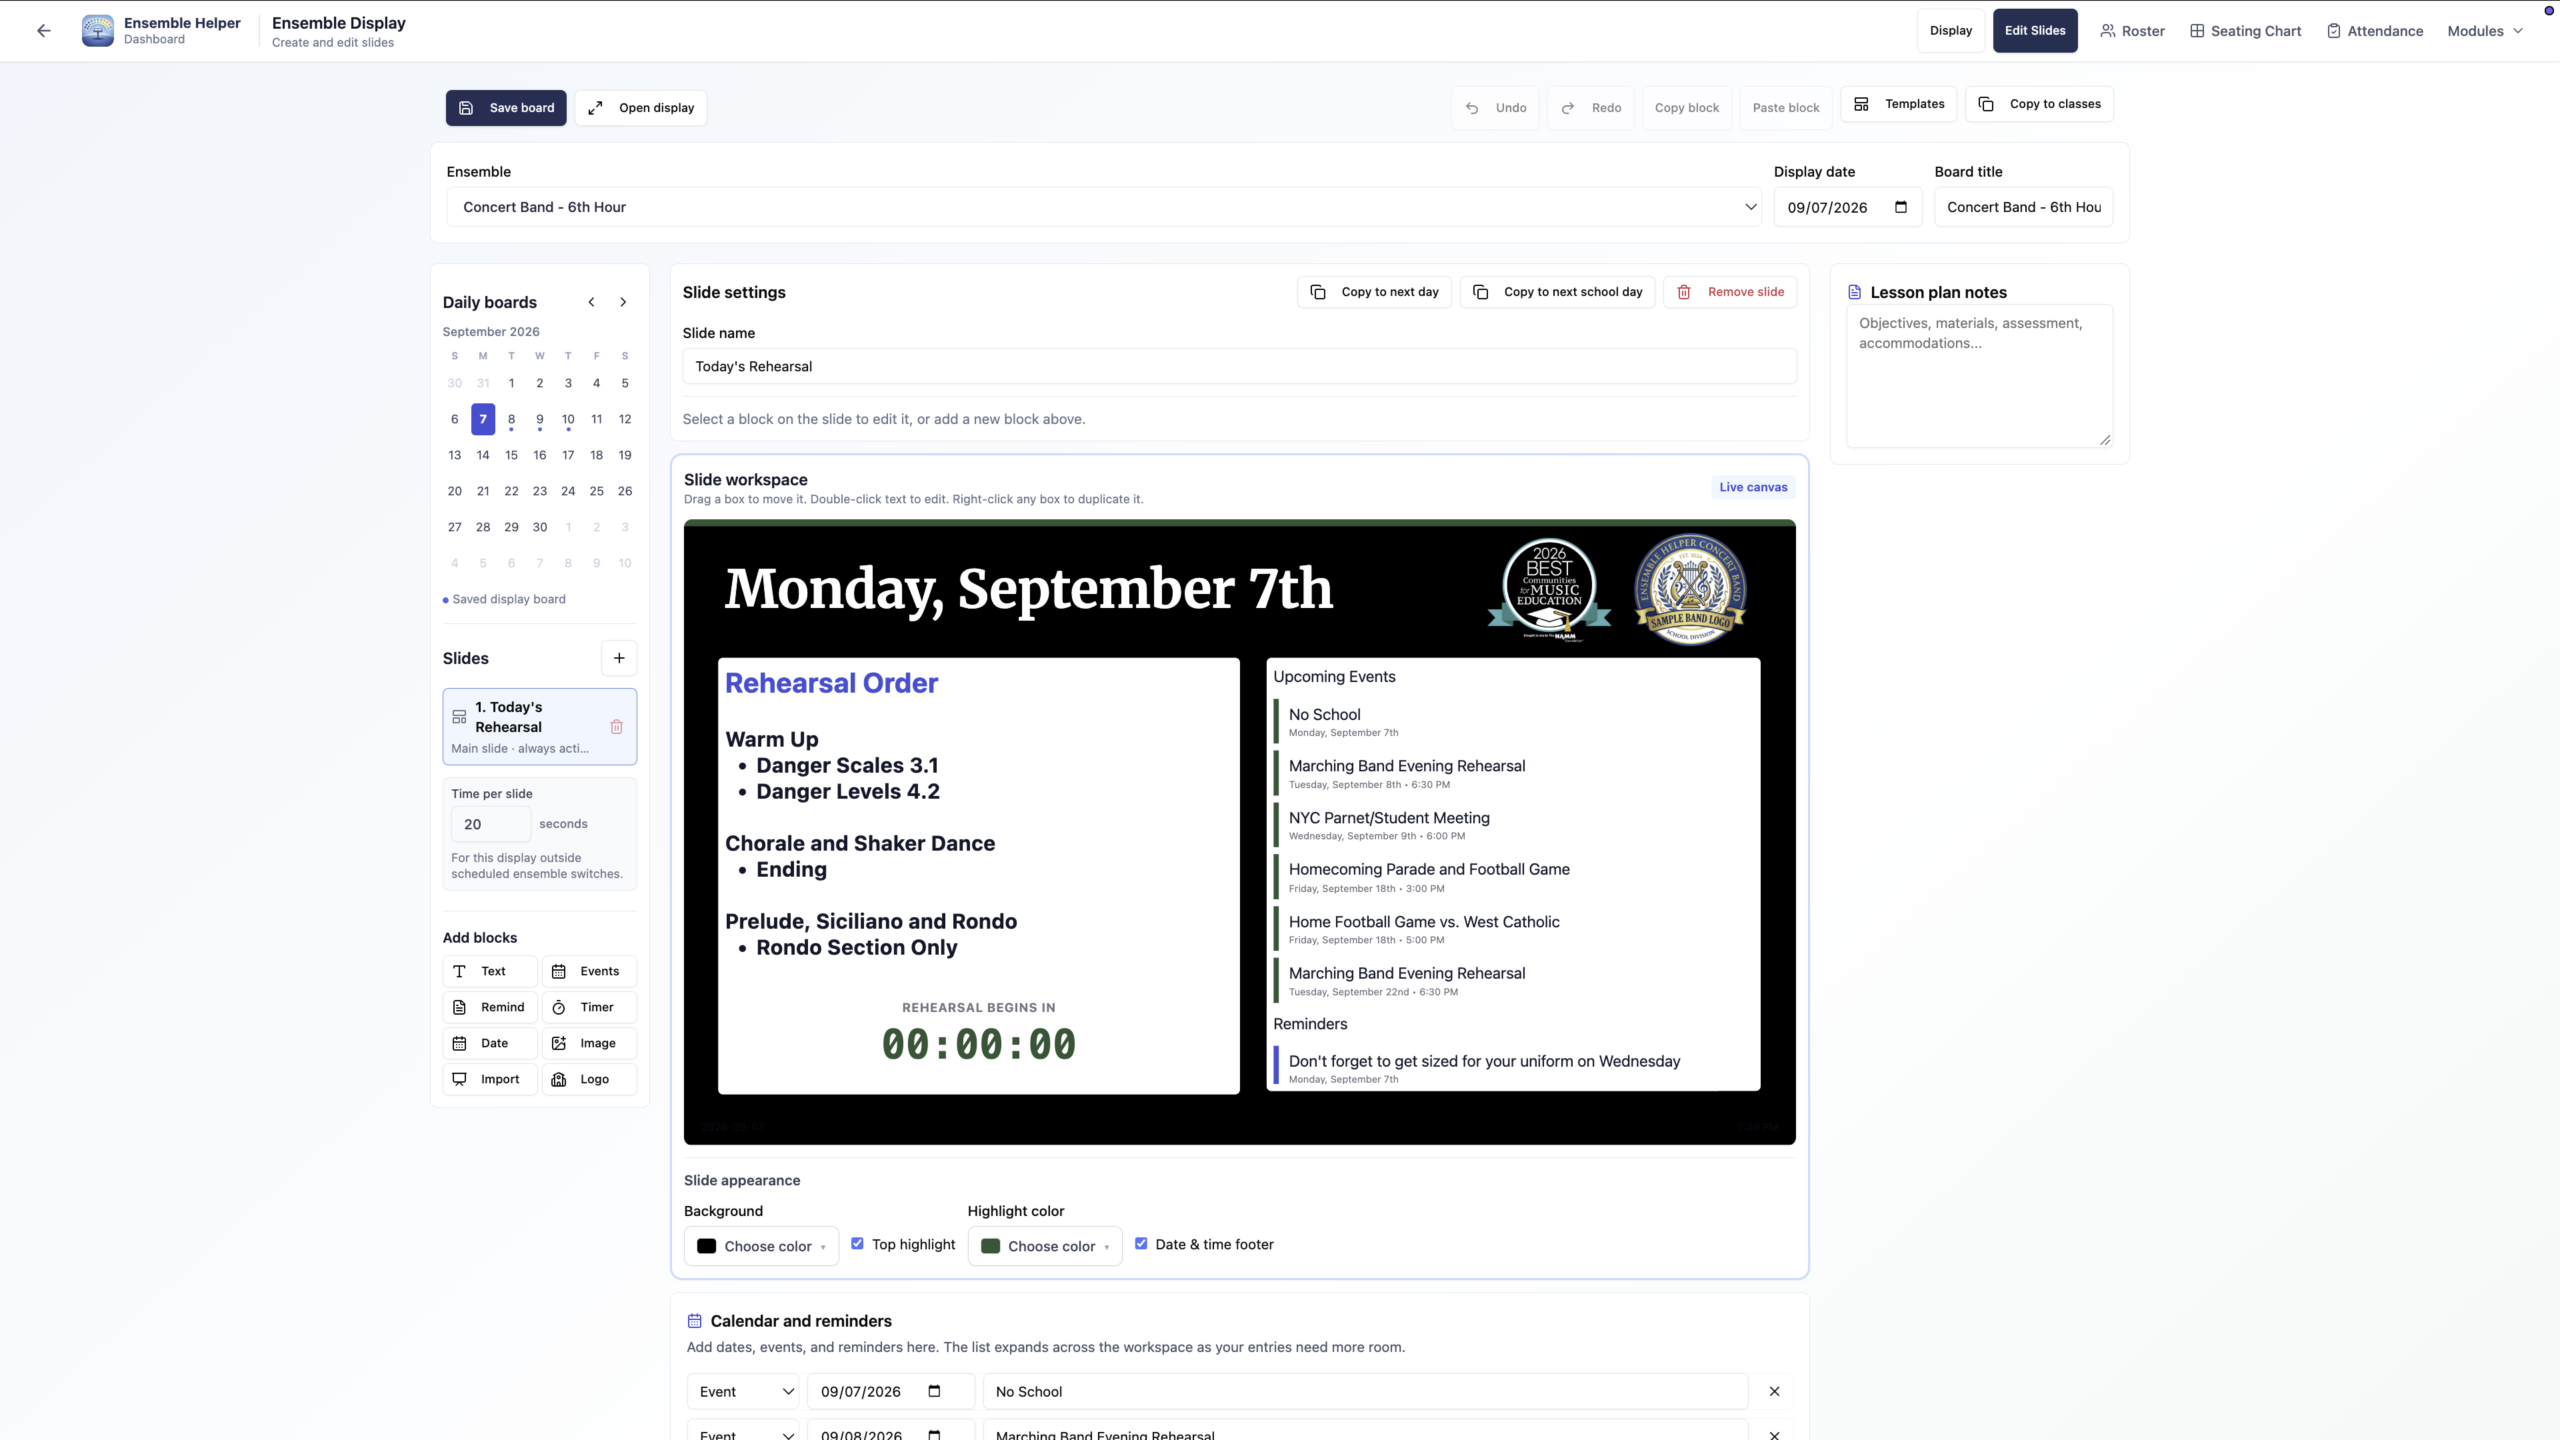
2. Build a simple first slide
Add a short welcome, the day’s rehearsal plan, and any reminders. Use formatted text and images as needed. Keep the text large and check that it is easy to read from across the room.
3. Add slides and save a template
Split longer information across several slides. When you have a layout you want to use again, save it as that ensemble’s default template. Each ensemble can have its own starting layout.
4. Plan the timing
Set the time the display should switch to each ensemble, including during passing time if useful. Class start and end times stay connected with Attendance. Set slide rotation separately to control how long each slide stays on screen.
5. Check playback before rehearsal
Play the display on the screen you will use with students. Check the ensemble, date, slide order, readability, and rotation pace. Review the next ensemble’s switch time before leaving the display running for the day.
6. Prepare the next day
Reuse your template or copy a slide to another class or the next school day. Update dates, reminders, and instructions in each copy. The next-school-day shortcut skips weekends; check your school calendar for holidays.
Three timing settings to remember
Class times describe the rehearsal period and connect with Attendance. Ensemble switch times decide when the next ensemble appears. Slide rotation controls the pace of slides within an ensemble.